
The idea for Taco Belle first popped into my head randomly a few years ago, but I never quite got around to trying it. With the Beauty and the Beast live action movie coming out in 2017 though, I think this would be the perfect time to finally bring my idea to life. It’s a pretty simple idea. Belle. As a taco. It’s a pretty obvious pun, and I couldn’t believe I’d never seen anybody do it before. After getting my Taco Belle underway I found out there are a few others out there, but I don’t think anybody has done a horizontal taco though before. Even if they have, eh, oh well, it’s new to me and was fun to make 🙂 For those curious about how long it took, I started this costume in late March and finished it in late June, working on it for maybe 4-5 hours a week. So grand total I’d estimate about 80 hours.
Special note, for anyone attempting this costume, your life will be 10 times easier if you purchase a ruffler foot before getting started. You can get generic ones on Amazon for about $20. Do it.
 +
+
Pannier cage skirt
The first stage of this costume was making a pannier skirt cage. A pannier skirt is what you think of when you picture Marie Antoinette, a big skirt that’s flat across the front and back but pushes way out to the sides. I thought this would be a good shape for my taco, and since Beauty and the Beast is supposed to take place in pre-revolutionary France, it’s actually period accurate too! A pannier cage skirt is sort of like a hoop skirt, in that is has round hoops to give it structure, but it’s flattened down with ties, and has an extra set of half-hoops to lift up the hips. You can make hoop skirts either by draping ribbon and attaching your structural pieces to the ribbon, or by making channels in fabric and running your structural pieces through the channels. I chose the latter.
I started by drafting the basic shape on muslin fabric. I wanted very light fabric to minimize the weight of the cage. Essentially this pattern was two semi circular shapes, with a wedge inserted at the hips. This website was a huge help for figuring out how to draft this pattern. My shape ended up being not exactly the same as any of these, but was most similar to the third rounded edge skirt on this page.
http://www.marquise.de/en/1700/howto/frauen/paniers.shtml
With the muslin skirt sewn together I folded the top over a stiff elastic waist band and started making channels in the skirt with a wide white ribbon. Mark the channels on your skirt and pin the ribbon around in circles. Leave the ends open and an inch or two of extra ribbon at each end, sewing just along the two long sides. Now you can insert your structural material to create the hoops. There are lots of different options here, and a well made pannier will use steel boning, but that gets expensive. Instead I used used thin flexible plastic piping, which is about $1 for 5 feet at home depot. When joining two pipes together, or when joining the ends when completing the circle, I used some short dowel that just barely fit inside the piping. Dab some glue on each and and jam it in there, then hold for a minute or two for it to set, and wrap the entire joint in duct tape. I’m pretty sure that’s what Marie Antoinette’s dress maker did….
With the structural piping in place sew up the ends of your ribbons for your round channels, but don’t sew up the hip channels yet. Now start attaching stays, which are just pieces of ribbon or rope to pull the sides of the hoops closer together to make the taco shape. I used the same thick white ribbon for my stays, and sewed it to the channel ribbon. It was tricky, you might want a helper to hold the skirt to shape while you sew in the stays. I used a sort of grappling technique of holding it closed with my legs while I sewed. I might have used my teeth at one point. Once you’ve got the stays in and the shape you want, you can adjust the hip hoops as needed and sew up the ends of those channels. Here’s a few pictures of the finished product, I tried to show the inside of the skirt, with the channels and the stays. As you can see from the last picture, I didn’t get a perfect line along both sides. That’s OK, the edges of the taco are bulky enough that they’ll be fairly smooth even with imperfections in the pannier skirt. Also the petticoat will help even it out.


Petticoat
The petticoat will not be seen by anybody so I didn’t feel the need to actually make it look nice. All it does is give the skirt a bit of puff and lift up off the pannier cage. I made a super wide waist band out of some left over scrap fabric. Leave the waist band open at the back, except for the very bottom. The waist band should be wide enough at the very bottom that it can be slipped on over either your hips or shoulders. Mine was about 6 inches wide. For a closure I used Velcro. Attach the scratchy Velcro facing out from the inner flap waist band so that if you have extra it doesn’t rub against your back. Attach the soft Velcro facing in from the outer flap of the waist band. Attach one going horizontally and one going vertically so you don’t have to have a perfect closure for it to grab.
Cut strips from a bolt of tulle into 1/4 widths, and maybe 5-10 yards long at a time so you don’t have too much to work with at a time. Now start gathering your tulle strips! The ruffler foot I mentioned at the start is very helpful here using the tightest possible ruffle, but you can also do it with a regular foot and a straight stitch, just set your tension super high and put a hand on your thread to give it even more tension. (I describe this method in my Kefka post.) You will be more prone to breaking your thread this way though, and for realzies, you’re gonna need a ruffler foot soon, so get one now. In total I’d estimate I gathered about 20 yards of tulle for my skirt, and the fabric was cut into four widths, so that’s 80 yards of strips. Take your strips and start by sewing one strip of tulle to the bottom of the waist band. When you get to the end of a strip just start with a new one, no need to sew them together, just overlap them a tiny bit. When you finish that row sew another strip to the bottom of the row, then another to the bottom of that. Three rows of strips should be enough length, but add a fourth if not. Do this over top of your pannier cage so you get the length right. It doesn’t have to get all the way to the floor, and it doesn’t have to be even, the swags and pleats of the main skirt will cover up any unevenness on your petticoat. Repeat this process to add more layers over the first layer of 3-4 rows. Add as many layers as you want for more fullness. I only did 2, and it worked out well. I didn’t want too much fullness, or it would make the dress more round and less taco shaped. Also, after I sewed the first layer (3 rows of strips) of my petticoat I was entirely fed up with sewing tulle, and it was so big it was quite hard to handle, so I cheated. I put another layer of tulle strips on top of the first layer, but I just staples them on. As long as you don’t grab and rip at the skirt (and why would you?!) this will be fine. As you can see my petticoat is super messy, who cares, it did its job.


Taco skirt
Now the fun part, the taco! The front and back of the skirt are a series of ruffled triangles, sewn one to another with piping in between to create lines of gold running down the skirt. On each side I created two large channels using upholstery foam, separated by a rectangular section of satin. My one regret for this costume is that I used a really cheap satin. When buying fabric I was looking at using about 10-12 yards, and I balked at spending so much on high quality satin. I bought some cheap stuff from WalMart instead, and it was not a good idea. It frayed so much and tore really easily. It also just looks kinda cheap. Wait for a good sale/coupon a JoAnns or somewhere else and get a heavier satin than I did. Here’s a super crappy pattern of what to cut, dimensions approximate, depends on your cage skirt, your height, your waist, how many ruffles and how much fullness you want.

Measure the longest length from waist to floor over your pannier, which will be right by your hip. Cut your wedges about 1.5 times this length. I did 60″ as that was the width of my fabric. You could definitely do yours lengthwise though and go for fuller ruffles. My wedges were about 18 inches wide at the bottom and 3-4 inches wide at the top. Ruffle each wedge. Here is where a ruffler foot is REALLY handy as you’ll save so much time, and you’ll also have better consistency between wedges. I had only ever gathered before by adjusting the tension on my machine and holding the thread, and while it’s fine for a rough gather, it’s a shit method for even ruffles. Even with a ruffler foot you might not get perfectly even ruffles, as the fabric may not move through the feed dogs evenly, but it’s much better than the tension method. You may need to do a few test runs first to determine what settings to use on your ruffler foot. Make sure to do your tests with the same fabric, as different fabrics will feel through at different rates.
I made my own gold piping for this as I couldn’t find the right colour. You can find tutorials for this online, but it’s essentially just sandwiching some cotton cord inside wide ribbon. Pin the wedges together with the right sides together, and the piping in between the wedges with the round part of the piping facing in (away from the raw edges.) You’ll want to use a piping foot for this to sew right up to the edge of the piping. Most sewing machines will come with a piping foot, or you can get an assorted box of presser feet on Amazon for $15-$20 which should come with a few sizes of piping feet along with other fun goodies. You can also do it by hand, but it will take a long time. How many wedges you need will depend on how wide you make them and how big your waist is, but sew together enough to go nearly from hip to hip, and then do it again for the back. Here’s a picture of a single wedge, and then a close up of what it looks like when they’re attached together. Nice pretty ruffles. The colour is a bit off in this picture, the piping is actually quite a bit more gold coloured than the fabric, which I think gives it a nice contrast.


As you get them together start draping them over your pannier, and petticoat if you have it made (I didn’t have it made yet at this point.) I needed I think 5 wedges for both front and back, but in addition to the size of your wedges and your waist it will also depend on how wide you make your seams.

With the front and the back complete, I started on the taco channels, which are the six rectangular pieces. Lay one rectangular piece on top of the other with the good sides both facing up, and sew along the left edge. Flip the top one over so you have access to the bottom piece, and lay the third piece on top, again with the good size facing up, and sew along the right edge, attaching it to the bottom rectangle. (This is going to create a channel where you’ll insert the foam, and then roll the side rectangles over it.) Do the same with the other three rectangles. I didn’t sew my channel to my front and back at this point, but I wish I had, so lets pretend I did. Now attach the front and the back by adding in one of the rectangular channels on either side. You’ll do the same as you did with the wedges, laying a piece of piping in between with the good sides together. Make sure when you’re sewing the right side of the channel to the skirt that you don’t sew in the left flap, and conversely when sewing the left side of the channel to the skirt that you don’t sew in the right flap. You know what, screw it, this is confusing me and I’m the one who made it, here’s a shitty demo using some paper:
Three rectangles, left, center, right. Attach left to center along their respective left edges. Attach right to center along their respective right edges, with their good (marked in pen for this demo) sides facing towards you so that when you open it up you see the good side of the center and the back side of the left and right. The raw edges of the two side rectangles should be either overlocked (a stitch that prevents fraying) or clipped with pinking shears.


Now fold the right side back down so that the good side is facing up. Consider this the good side for the whole channel. Treating it like another wedge, attach it to the dress front with good sides facing together. Include a piece of piping (not shown). Do the same with the left side and the dress back.


Now you should be able to look at the whole thing and see a nice piped seam between the dress back and the left side of the channel, and between the dress front and the right side of the channel, and when you look into the channel you should see just nice seams (although that doesn’t really matter since it will be closed up.


Do this for the other set as well, but leave about 12″ open at the top when you sew the channel to the back of the dress so that you can put it on. I folded over my edges and attached some c-clasps and a bit of Velcro. It won’t be seen.
Next I cut 2″ upholstery foam into long rectangles, about 4″ wide and as long as from my waist to the floor along the slide of the pannier. Place a foam section along the inside edge of each channel, and fold the side piece up over and around it. I used a bit of spray adhesive to hold them in place, and then hand stitched the folded over satin in place. It won’t be seen so it doesn’t have to look perfect. At the bottom of the taco channel I made a separate upholstery foam piece rolled in satin and hand stitched it to the bottom channels to close them up (not pictured in the first image, but seen in the 2nd image which also includes the taco fillings.) I also used some thick thread to sew a “stay” in the middle of the channel, to pull the two sides together (not pictured below.)


Now you can make a waistband, I used heavy webbing as I didn’t trust the structure of my cheap satin. Attach the dress to the waistband. It will end up being covered by your corset so it doesn’t have to look very neat. Mine looks terrible.
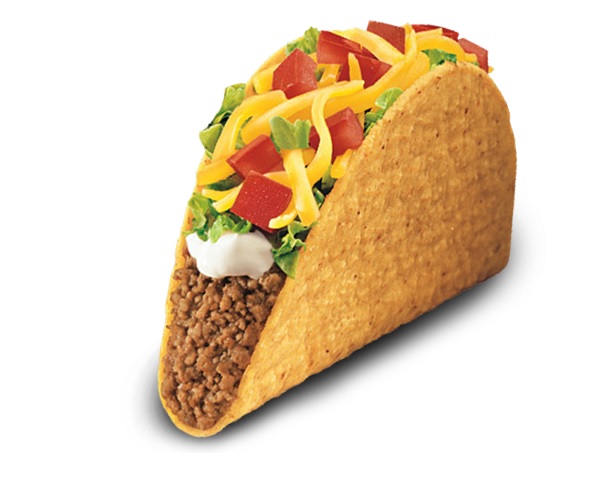
Now fill the taco! You have so many options for this, just like making a real taco 🙂 First I made lettuce out of green satin, sewing a long stiff ruffle, and attached it all the way around the inside of the taco shell channel. Then I made big rolls of brown tulle for the meat/beans and scrunched it a bit as I added it. I attached all the tulle with hot glue. Then I made smaller bunches of orange and yellow tulle to be the cheese, and attached them randomly around the edge of the channel inside the lettuce. Finally I made tomatoes out of upholstery foam cubes spray painted red. Other options might be onions, guacamole, or sour scream dollops. I was out of the country for two months over the summer leading up to DragonCon and was super pressed for time, so my toppings are pretty basic. If I were to re-do it I might take the time to make some tomato wedges, with seeds and ridges and stuff, or similarly little onion wedges. Maybe for next year.


Hem all the bottoms by hand. This part kinda sucks and mine looks crappy. I think maybe if I’d used more thinner wedges through the center instead of wide ones it would have looked nicer, because the way it is now the wedges near the edge of the taco are pulled much tighter than the wedges in the center, which hang quite a bit. I was trying to reduce the amount of ruffling and piping I’d have to do as I was pressed for time. Make sure to put your petticoat under your skirt first, and account for any heels you might be wearing (don’t wear heels…please, this costume is hard enough to move around in, I wore yellow Toms.)
I tried adding a few different styles of swags of the style that Belle has in the pictures at the start of this post, but I didn’t really like any of them. They all made the gown look nicer, and more like Belle’s, but they broke up the line of the taco, and took away from the shape. So ultimately I decided to leave it bare, looking less like the ball gown, but more like a taco. Creative compromises!
As far as how to transport the dress. I ended up laying the taco down with the sides up and putting it on top of the pannier skirt, which collapses down flat. Then I wrapped the whole thing in a sheet to protect it and tied some soft rope around it. It’s super light and quite easy to carry by the rope handles. Though it did sort of look like we were moving a body…Doggo shown for scale.


Corset top
I made my corset top using the Simplicity 1345 “D” pattern, but I didn’t follow the instructions as I used duck fabric for strength instead of interfacing and I wanted a different bottom and a lace overlay. Using the main bodice pattern pieces I cut out all the pieces from my satin, lace, duck, and lining. Baste the lace to the satin, then sew up the seams of all the pieces, except the back of course, which remains open. I didn’t take a lot of pictures of this process, but the description in the pattern and in here should be enough to go by. That being said, you could probably buy a decent corset for the same amount that it will cost you in materials to make one. I decided to make it as I wanted to give corset making a try, and as I wanted a specific kind of lace, but it was a real pain in the arse.


Sew up the seams of all the pieces of the duck and lining (but don’t sew the duck to the lining). Now press your seams and attach your boning to the lining along all the inside of the seams, and also along the back edges, leaving room for the hem allowance (try it on before you put in the final boning on the back to make sure you don’t need to trim it!) I ran my boning from 5/8″ below the top to 5/8″ above the bottom of each seam, and trimmed 1/4″ of boning out of the fabric channel on the top. Then I attached the lining to the duck, and sewed along the outside of all the boning channels as well, sandwiching them between the lining and duck.
Next place your lace/satin piece on top of the lining/duck, with the good sides (lace and lining) facing each other. Sew up the top and side seams, clip the corners, turn out and press. Sew a line along the bottom of all four pieces 5/8″ from the bottom, and overlock the rough ends. Now take a piece of the same piping and attach it to the bottom of the corset with the rounded pipe end facing up, and stitch along the same line you just stitched. Use a piping foot to get close. Now turn the edge under, press, and stitch it to the lining/duck layer.
Using a eyelet tool add 8-10 eyelets (use the eyelet+washer type) along both sides of the back and lace up with gold paracord. Note, my eyelets started to come out as I did up and undid the corset! I don’t know why, I used the exact right size eyelet for the hole I punched. I guess I needed to use one slightly larger?
I made the shoulder band with a different lighter yellow colour of satin for contrast. I cut a rectangle as long as I wanted the band to be (drape it over your shoulders and test) plus an inch for seams, and I made it 20″ wide. Fold it over good sides together and sew along the long edge, then turned out. Sew up each end (placing the length wise seam in the middle) overlock the edges, and gather/ruffle the ends. Then sew these two ends together, keeping the length wise seam to the inside. I sewed a few more vertical ruffle stitches along the length of the shoulder band by hand to keep it gathered, and then I added a dart at the top (just pinching in a little bit of fabric so that the circumfrence of the band is smaller at the top vs the bottom). Just basically try it on and pin where you want to pull in fabric. I stitched the shoulder band to the front of the corset, and stitched some snaps to attach it to the corset in the back.


Finally I made a flower for the front of the shoulder band out of taco bell hot sauce packets. I cut the ends off the packets and emptied and washed them first of course, then just glued them together into circles, pulling them tight so they stood out, and curled the ends over.I glued a safety pin to the back so that I could remove it from the corset for safe storage.

Accessorizing
There wasn’t much accessorizing to do for this one. I added some purchased yellow gold gloves and yellow pearl earrings, then put a top bun in my hair using a hair donut and tied some gold ribbon around it.
Beast
For my husband I made a fairly simple Beast/chihuahua costume, it’s just a blue velvet jacket and gold vest purchased off Amazon because I didn’t have time to make them. I used bright yellow fabric paint to make the collar yellow and then added gold bias tape all the way around and as trim. I made a little white cravat and a pin with the taco bell bell on it.
I started making him what I thought was a really nice chihuahua mask, forming the shape out of a few layers of aluminum foil and then adding layers of paper mache to both sides. I got the shape just perfect, but couldn’t get the colouring right because I’m a terrible painter. Then WalMart came out with those absurd fur animal heads, so we got one that was supposed to be a bear I think and modified it with some new ears, a bit of paint, and some elastic to adjust the cheeks slightly. Topped it all of with a “Yo quiero Taco Belle” sign. My shoulder band popped off during part of it (see 2nd photo with some awesome mariachis) and I had to sew it back down, but otherwise Taco Belle went off without a hitch and was a huge hit at DragonCon! I plan to do a few fixes before next year, including maybe some better toppings, and fixing the really quite crappy hem, but Taco Belle will definitely be back 🙂

